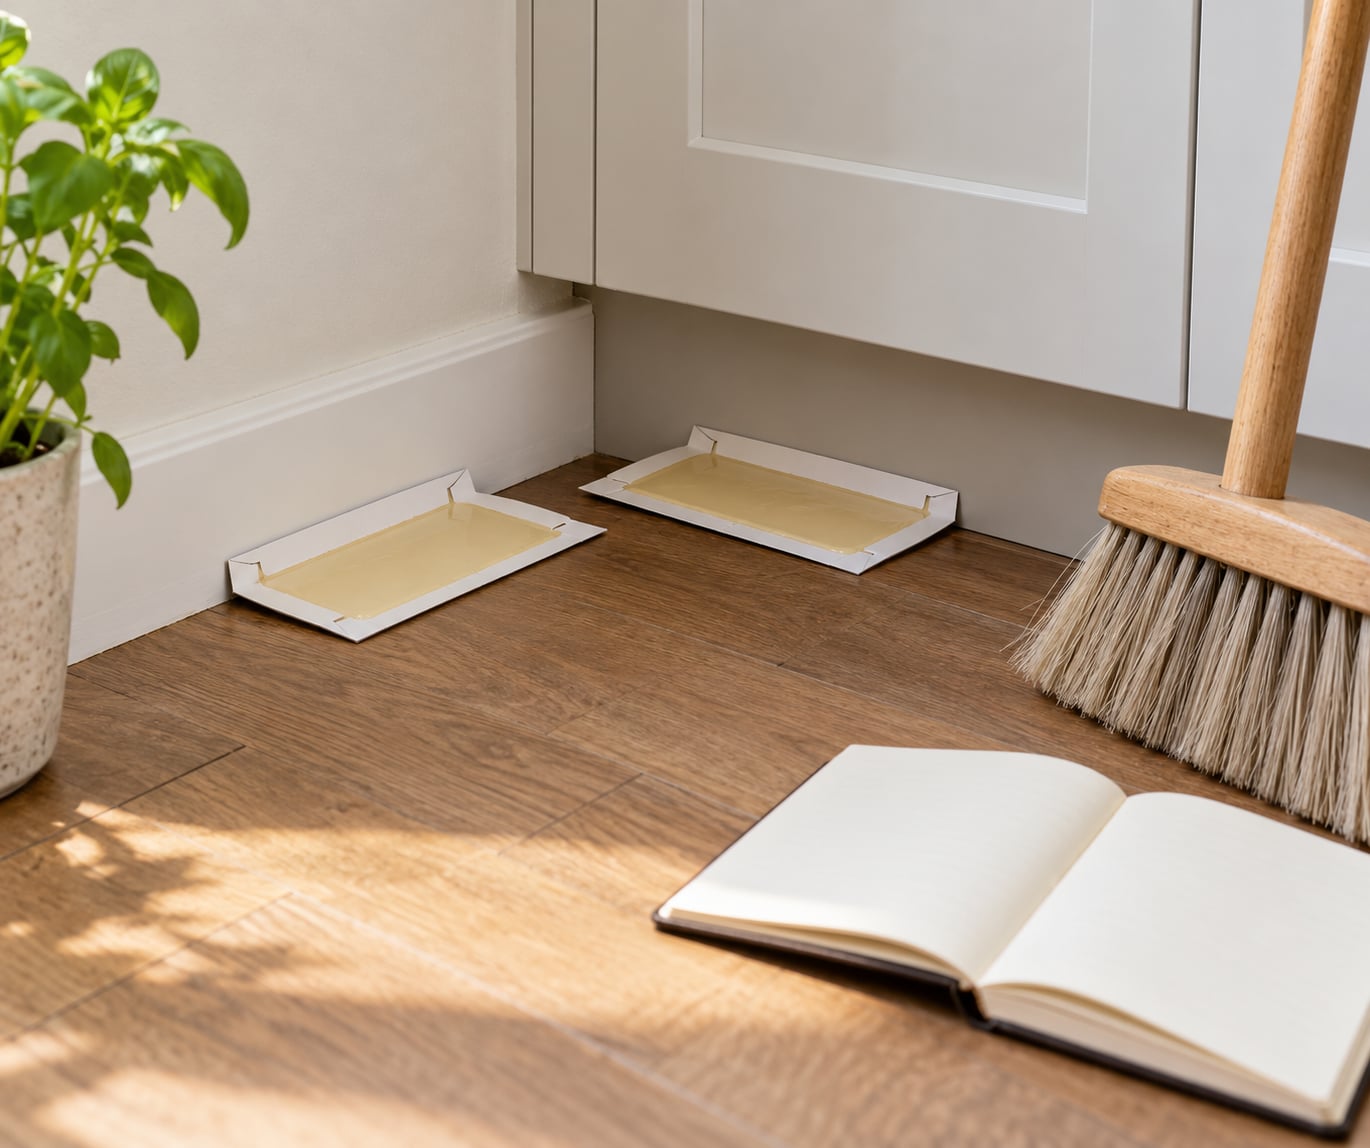
Sticky traps how to place them for best results comes down to one rule: put them where pests already walk, which is along walls, baseboards and cabinet edges rather than out in the middle of the floor. A sticky trap, also called a glue board, is a flat board or tray with adhesive exposed on top that holds rodents and cockroaches on contact, without any poison involved. Set the first one in the right runway and it tells you where the activity is. Set it in open floor and it stays clean for a month.
Most of the placement advice that circulates online is decent. Very little of it tells you how many traps a room needs, how far from the wall to set them, or what to do when a mouse walks off with a small board. That is what this guide covers, and it works for both the rodents and the cockroach side of the problem, since the two need different spots.
Table of Contents
What You Need
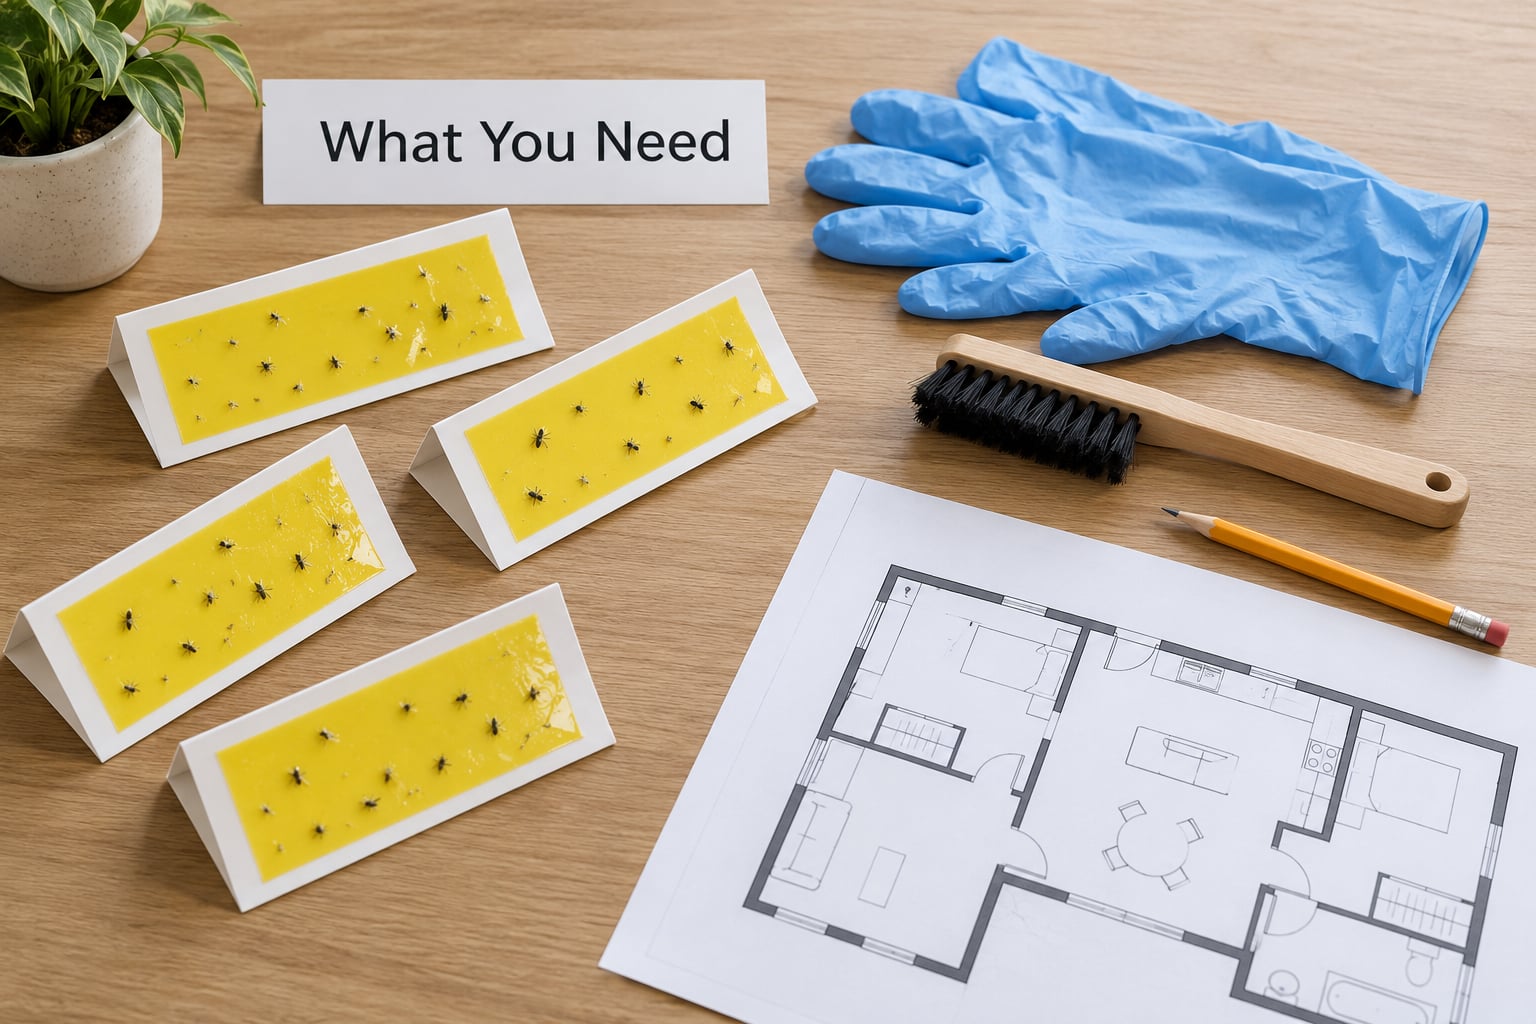
You do not need much, which is the nice part about this job. Grab the items below and you can set a full monitoring station in an afternoon.
- Traps in more than one size. Mouse-sized boards, rat-sized boards and small cockroach monitors catch very different things. Thin, low-profile boards also slide under appliances and cabinets where a stiff tray will not go.
- An attractant where the trap type calls for it. Some glue boards ship with a scent lure already in the tray. Unbaited boards work too, they just tell you less about why the catch happened.
- Gloves. Disposable nitrile or latex gloves keep your scent off the board and protect your hands when you handle a catch.
- A small stiff brush or putty knife. For lifting a board, brushing fur off a surface, and cleaning the floor after disposal.
- A flashlight. Dark corners under the sink and behind the fridge hide droppings you would otherwise miss.
- A marker and a sheet of paper. Label each board with a number, the room and the date you set it. Without labels, trap counts are just noise.
- Paper towels, a sealed bag and disinfectant. For handling and discarding catches without spreading scent around.
One thing worth adding before you start: a rough sketch of each room. Draw the cabinets, the appliances, the doors and the baseboards. Marking placements on paper is much faster than crawling around with a mental map at midnight when you are checking catches.
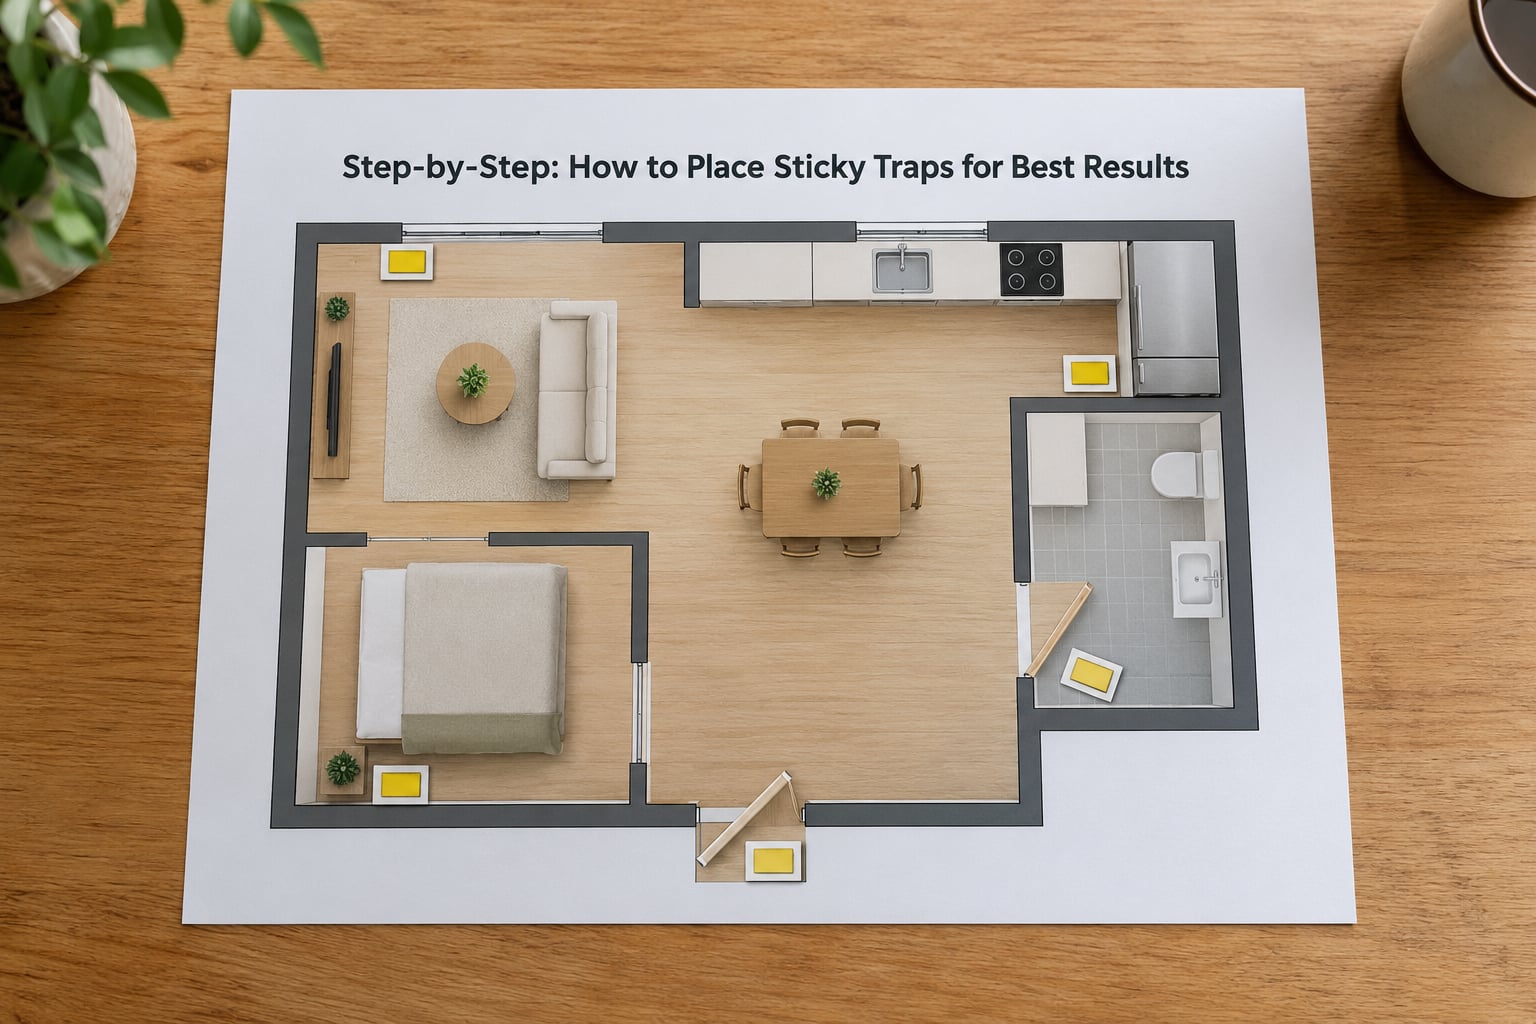
Step-by-Step: How to Place Sticky Traps for Best Results
Step 1: Identify the Pest and Monitoring Area
Decide what you are hunting before you place anything, because mice and cockroaches want different traps in different rooms. Rodent droppings are small, dark and scattered along a wall or under a cabinet. Cockroach activity looks different: droppings that look like ground coffee or pepper, a musty odor, egg cases, or shed skins tucked in a harborage zone.
Then pick your monitoring area. For rodents that means the kitchen, pantry, garage, basement or utility room, whichever shows evidence. For cockroaches it means under the sink, behind the refrigerator, inside lower cabinets, and near the bathroom. If you live in an apartment, add the hallway outside your door and the gaps around the baseboards that face a shared wall, since activity often originates next door and reaches you through a pipe or wall void.
Keep your scope realistic. A sticky trap is a diagnostic tool. It shows you where pests travel and roughly how many are moving through a space, and it works best as part of an integrated pest management approach alongside sealing, sanitation and, when the count is high, bait or a professional treatment.
Step 2: Choose the Right Sticky Trap
Pick the trap that matches the pest and the location. Low-profile fold-flat boards fit under appliances and behind stoves. Rigid trays laid flat on the floor work well along baseboards and in corners. Enclosed glue stations cost more but keep a captured mouse contained, which matters if you have pets or small children. For cockroaches, small monitors with a lure built in belong under cabinets and inside harborage zones rather than in the middle of a room.
Match the size to the animal. A board sized for a cricket is not going to hold a mouse, and a mouse board laid on its edge is unstable. Sturdier, larger boards with high-tack adhesive also resist the dragging problem described later in the common mistakes section.
Step 3: Map High-Activity Routes
Traps belong where signs already are, not in random spots. Spend twenty minutes looking before you place anything.
Look for droppings, especially along baseboards and in the back corners of cabinets. Check under the sink, behind the refrigerator, under the stove, along the plumbing penetrations where pipes enter the wall, and inside any wall void you can reach. Rub marks on wall surfaces, greasy streaks along a baseboard, and damaged food packaging all point to a route.
For mice specifically, the route is almost always a wall or an edge. They hug the perimeter of a room because open floor is exposed, and a mouse that feels exposed is a mouse that turns around. In r/pestcontrol, the repeated advice is the same: set boards perpendicular to the wall, along the path where you found the droppings. For cockroaches the route follows harborage and edges too, so the corners where cabinets meet the wall and the hinge side of cabinet doors earn your highest catch rates.
This is also the step where you learn where not to place. Skip the middle of the floor, skip the middle of the room and skip the spot that is convenient because it was the first one you unboxed.
Step 4: Position Traps Along Edges and Activity Points
Here is the placement geometry that matters most. Put the long edge of the board flat against the wall or baseboard, then angle it so the short end sticks out into the room. Experienced users describe this as setting a trap perpendicular to the wall, or at a slight angle to it, with the exposed adhesive facing outward into the travel lane. This intercepts a mouse moving along the baseboard instead of hoping it crosses the board at speed.
Keep that board within about an inch or two of the surface. A trap set three inches out on the floor is a trap nobody inspects, and it also collects dust fast, which dulls the adhesive.
Use this room-by-room list as your placement map:
| Room | Where to place sticky traps | What you are looking for |
|---|---|---|
| Kitchen | Back corners of lower cabinets, under the sink, behind and beside the refrigerator, along the baseboard behind the stove, and where the water line enters the wall | Rodent runways and the harborage edges cockroaches return to |
| Bathroom | Under the vanity, behind the toilet, along the tub or shower edge, and in the corner where the toilet meets the wall | Roach harborage and moisture-driven insect activity |
| Pantry | Along the baseboards on every wall, in the back corners, and beside any floor-level pet food or birdseed container | Early rodent entry, often from a bag that was stored low |
| Basement and utility room | Along the perimeter at 6 to 10 foot intervals, beside the water heater, around plumbing penetrations, and near the washing machine supply lines | The source population for the whole house |
| Garage | Along the wall shared with the house, near the garage door threshold, and beside stored vehicles or cardboard | The entry point, often the most common one |
| Apartment unit | Both sides of every exterior door, along the baseboards of shared walls, under the kitchen sink, and in the hall outside your door | Neighboring-unit pressure and pipe or wall-void travel |
Mice and cockroaches still differ once you are inside those rooms. A mouse board wants a flat wall lane with nothing between it and the baseboard, while a cockroach monitor wants the tight harborage edge, the hinge side of a cabinet door, or the underside of a shelf. Neither pest cares about the center of the room, and neither is worth targeting there.
Step 5: Check, Label, and Adjust the Traps
Check every two to three days in an active infestation, and at least weekly once counts start falling. Cockroach activity is nocturnal, so a daytime glance is less useful than a nighttime one with a flashlight. A trap you never inspect is a trap you never replace, and a dust-coated board stops catching long before the glue looks used up.
Log the catch count per location, and more importantly, log the board number so you can compare the same spot week to week. The count trend tells you what to do next:
| Trap count trend over two to three weeks | What it usually means | Action to take |
|---|---|---|
| Falling each week | Traffic is declining, whether from your efforts or from pressure elsewhere in the building | Keep monitoring for two more weeks before you call it done |
| Flat but non-zero | A stable population is still coming in from a hidden source | Add boards at entry points, then seal gaps larger than a dime |
| Rising or spread to new rooms | The infestation is bigger than the area you are treating | Expand coverage, look for a new entry point, and consider professional help |
| Zero after two weeks in a spot with signs | Trap is too large, too dusty, badly placed, or the signs are old | Reset with a fresh smaller board in the exact trail |
Move or add boards when the data says so. If a location catches consistently but a neighboring room shows droppings and nothing on the boards, add boards there rather than moving good ones. If a board is dusty, covered in cobwebs or frayed at the edge, replace it in the same spot instead of repositioning, because the spot was never the problem.
Wear gloves, and keep a caught rodent handled humanely. If you find a live mouse on a board and you want to release it, slide the whole board into a lidded container with air holes and some food, carry it well away from the house, and open it outdoors. Many people find this part of the job genuinely hard, and that is fine. If you would rather not do it, seal the board in a bag, check local disposal rules, and note that glue traps are restricted or banned in some states and countries, so look up your local regulations before buying a large pack.
Step 6: Replace Traps and Combine Traps With Prevention
Replace boards on a schedule, not on sight. Kitchens and garages need fresh traps every two weeks because dust and grease kill tack quickly. Dry utility rooms and basements hold out longer, often a month. Any board that has caught something goes out immediately, along with the mess around it, and replaced the same day.
Placement only pays off if the route is closed behind it. Wipe up food residue, move pet food and birdseed off the floor, take out trash on a schedule, and fix the drip under the sink that gives cockroaches their water. Seal gaps around plumbing penetrations, baseboards, and where siding meets the foundation, and add a door sweep to the garage or back door. Then adjust your placements seasonally: more boards outdoors near entry points in the fall, more interior boards near food sources in the summer, since cockroach pressure typically peaks in the warm months.
One more caution, and it is a big one. Never spray insecticide near a sticky board or a bait station. The spray residue contaminates the board and repels the very pests you are trying to catch, which is exactly the complaint that shows up repeatedly in product reviews, where boards set next to poison bait caught nothing while the bait kept getting eaten. If you are using gel bait, place the traps nearby but not touching the bait, and keep cleaning chemicals off both.
Common Mistakes
Almost every disappointing trap result traces back to one of these. Each has a straightforward fix.
- Setting boards in the open floor. The most common error by far. Fix: move the board to a wall, baseboard or cabinet edge so the trap sits inside the travel lane.
- Leaving a gap between the board and the wall. A board set an inch or two out catches dust and nothing else. Fix: press the long edge flush against the baseboard or wall.
- Running the board parallel to the wall in open floor. A mouse following the baseboard can walk right past it. Fix: angle the board perpendicular to the wall with the adhesive facing out into the lane.
- Placing boards next to poison bait. Both compete for the same animal, and the spray or bait residue can repel it. Fix: separate them by a few feet, keep them on the same route, and never spray near either.
- Using a board that is too small or too old. Small boards are what mice drag away, and a worn board is a trap that stopped working before you noticed. Fix: use the size matched to the pest and replace on schedule.
- Setting one trap in a whole house. One board cannot cover four rooms and three entry points. Fix: aim for a board in every suspect room plus the entry points, roughly one per 10 to 15 feet of perimeter in a basement or garage.
- Handling boards bare-handed. Your scent marks the board, and you are handling the catch later anyway. Fix: gloves on for placement, checks and disposal.
- Placing traps where kids, pets or food sit. A non-target catch is a real risk, especially with a dog in the house. Fix: use enclosed stations, put boards behind appliances, in wall voids, or under cabinets, and never on a counter or food shelf.
- Not labelling anything. Without a number, room and date you cannot tell a falling count from a rising one. Fix: write it on the board with a marker at placement.
Frequently Asked Questions
Where should sticky traps be placed in a house?
Along walls, baseboards and cabinet edges rather than in open floor. Set the long edge flush to the wall and angle the board perpendicular to it so the adhesive faces the travel lane. Focus on under-sink plumbing penetrations, behind and beside the refrigerator, under the stove, garage thresholds, pantry baseboards, and both sides of exterior doors. Leave the center of every room empty.
Do sticky traps work better on the floor or on walls?
On surfaces the pest already travels, which usually means the floor next to a wall or the underside of a shelf. A flat board pressed against a baseboard catches far more than the same board on an empty floor or propped against a wall. Wall-mounted boxes exist and help with monitors in high-traffic spots, but for most home placements the floor-and-edge position wins.
How many sticky traps should I use in one room?
Start with one per suspect area and one at each entry point, so two or three in an average kitchen and one more in the corner where the water line enters the wall. In a basement, garage or utility room, run boards along the perimeter about every 6 to 10 feet. Add boards where droppings appear rather than clustering them all in the room that seems worst.
Should sticky traps be used with bait or poison?
It depends on the goal. An unbaited board tells you where pests travel, and a baited board tells you that plus what attracts them. You do not need poison, and combining boards with rodenticide often splits traffic instead of catching it, so separate them by a few feet and never spray insecticide near either. For a heavy cockroach population, gel bait plus monitors in the same harborage edges works better than boards alone.
How often should I replace sticky traps?
Every two weeks in kitchens, garages and other dusty or greasy rooms, and about monthly in dry basements and closets. Replace immediately after any catch, and any time the board looks furred, dusty or frayed at the edge. Empty traps are not proof that a room is clear, so keep monitoring for two more weeks after counts fall to zero before you stand down.
Start in one room tonight. Find the droppings, put a fresh board perpendicular to the wall along the trail, label it with the date, and check it in two or three days. That single board will tell you more than a dozen traps scattered around the house ever will, and everything after it is just adjusting to what the count shows you.