Bathroom ants are almost never there for the food in your trash. They come for water, humidity and the sweet-smelling residue around your sink, and they walk in through a gap as narrow as 1/16 of an inch. To get rid of ants in a bathroom, you have to do four things in order: dry it out, wipe away their scent trail, seal the opening they use, and put bait where the ants are actively feeding. Most of this job takes an evening of work and two to four weeks of patience, and you can do all of it with soap, water, a caulk gun and a bait product labeled for indoor use.
A spritz of aerosol kills the three ants you can see and leaves the colony untouched. That is the trap most people fall into, so the plan below puts the trail and the entry point ahead of the spray can.
What You Need
Gather everything before you start, because you will be moving back and forth between the sink, the baseboards and the under-sink cabinet all evening.
- A flashlight to check cracks, plumbing penetrations and the tub edge, especially in a dark vanity cabinet.
- A magnifying glass or your phone camera to look at head shape, waist and body color when you capture a sample.
- A small sealed container or a piece of tape to trap one or two ants for identification. Do not need the whole trail.
- Gloves, since you will be under the sink and around the toilet base where the grime sits.
- A bathroom-safe cleaner such as mild dish soap and water, plus a toothbrush for grout lines and the base of fixtures.
- Paper towels and a vacuum for trail removal and for sweeping up dead ants later in the treatment.
- Ant bait labeled for indoor use, gel or liquid, kept in a place children and pets cannot reach it.
- Paintable interior caulk or plumber’s putty for gaps along baseboards and around plumbing pipes.
- Optional: copper mesh, or a crack-and-gap filler rated for indoor use, for gaps too wide for caulk alone.
Step-by-Step: How to Get Rid of Ants in a Bathroom
The fastest way to get rid of ants in the bathroom is a combined attack on moisture, trail and access point, with bait doing the slow work of collapsing the colony. Work through these six steps in order, and give the process the two weeks most labels allow before you judge it.
Step 1: Identify the Ant and Its Entry Points
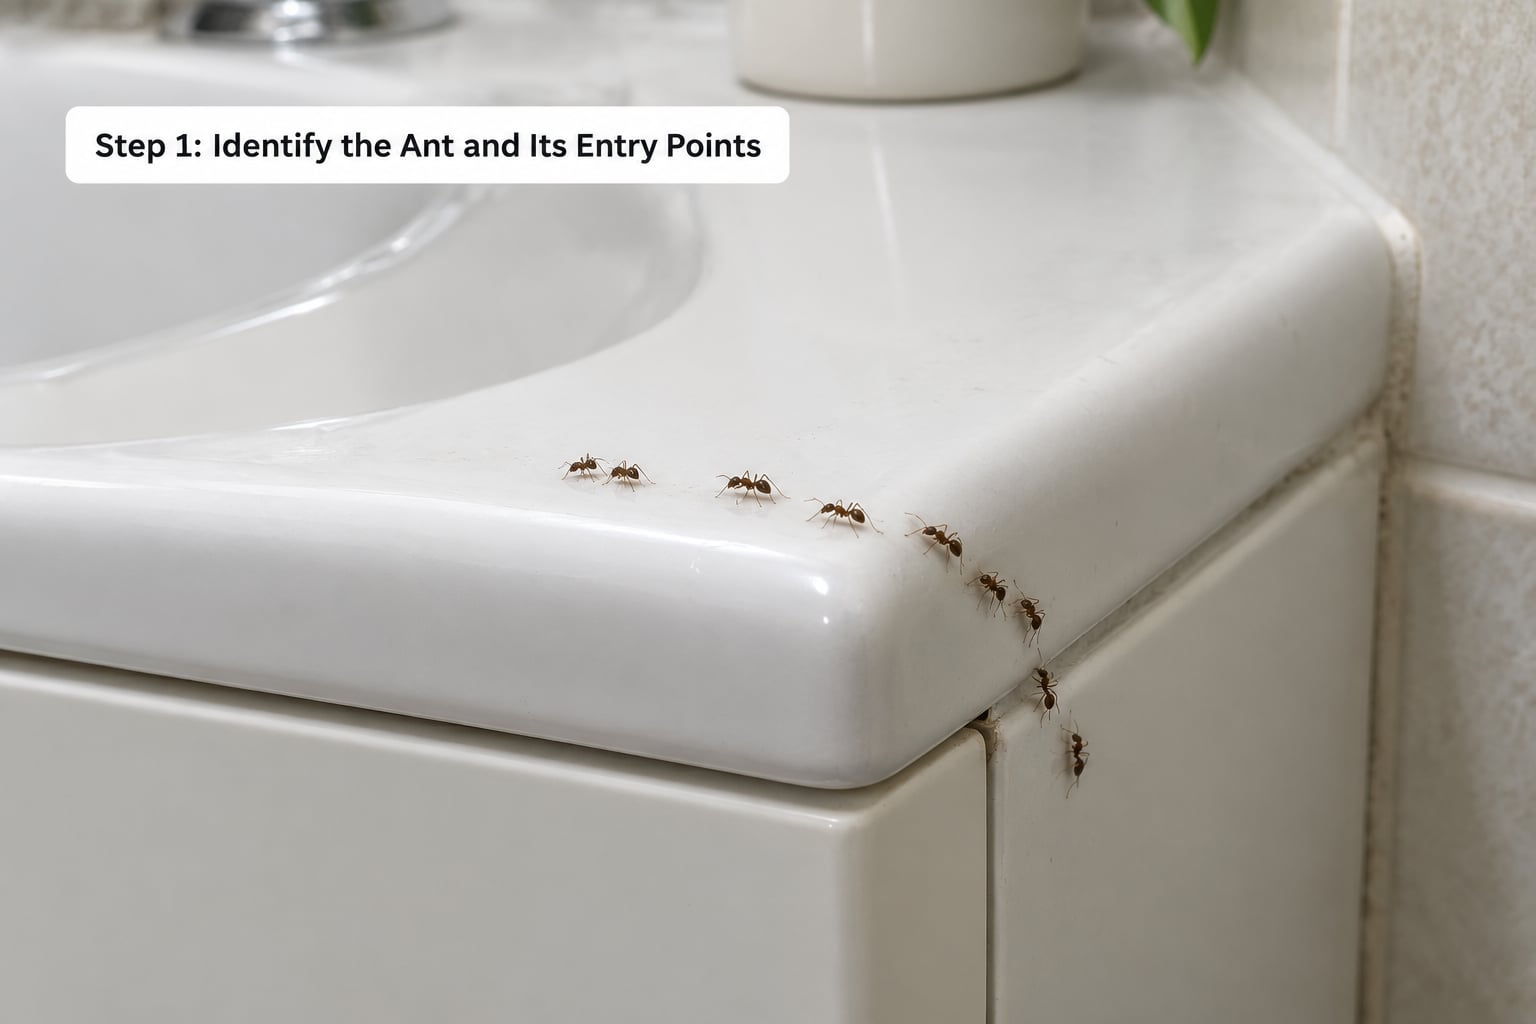
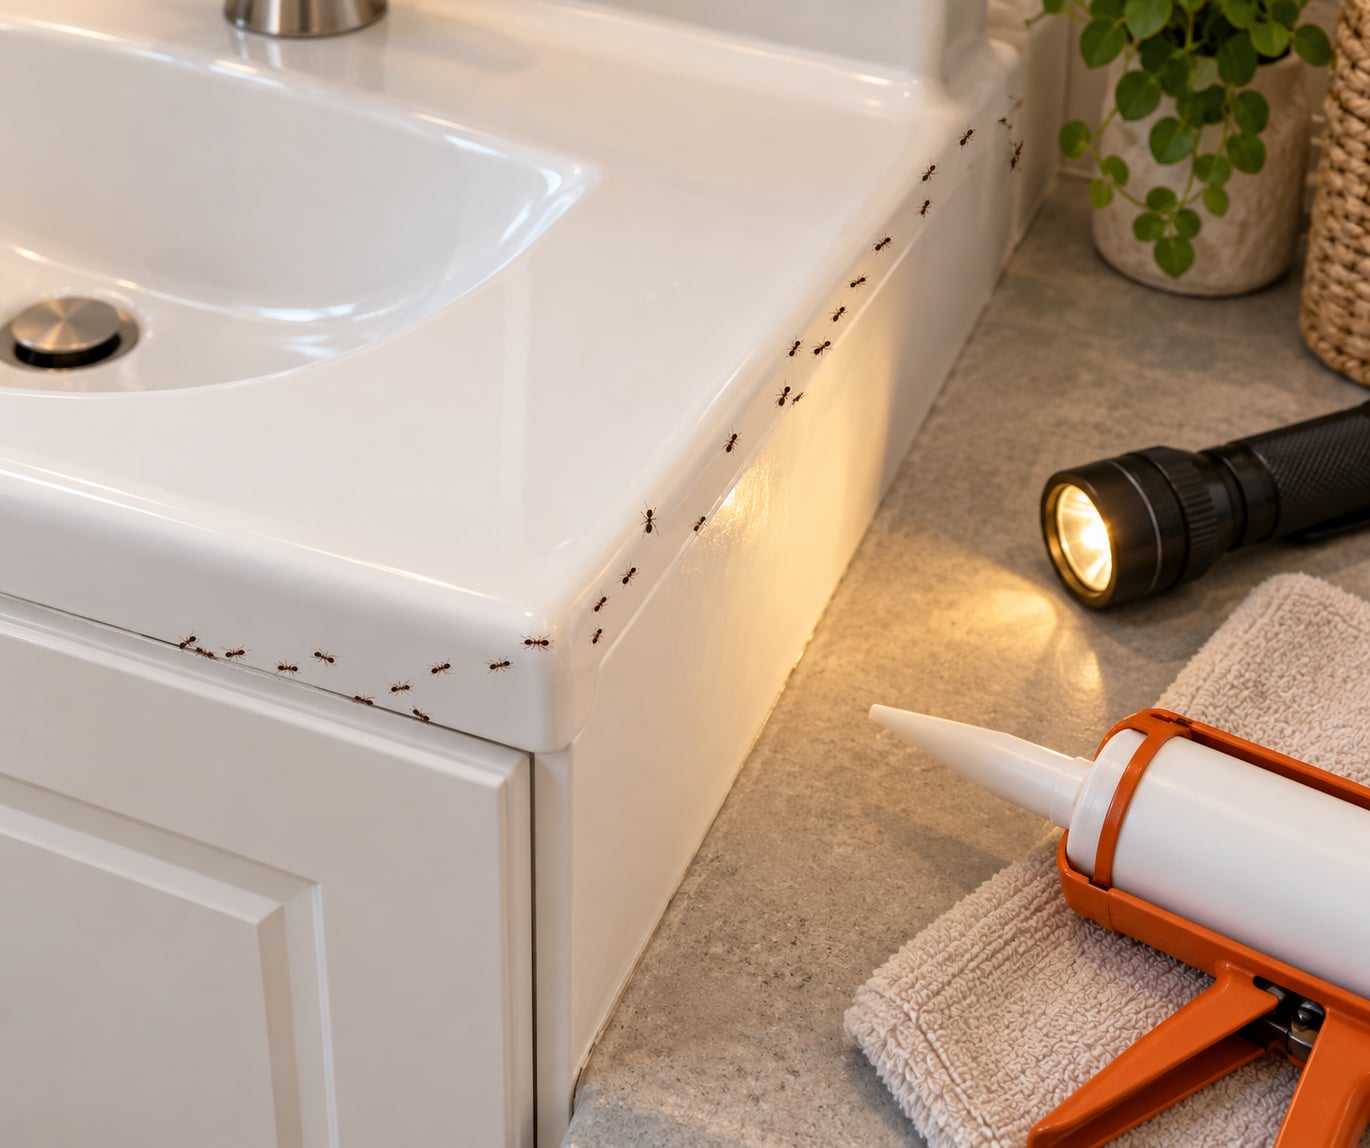
Start by watching, not spraying. Put the flashlight low and follow a single line of ants backward, or wait until dark and come in with a flashlight switched on while the room lights are off. Most people find the trail running along a baseboard, under the vanity, around the toilet base or along the tub edge, which matches what other homeowners describe on r/pestcontrol.
Check the places a trail usually ends: the gap where a pipe enters the wall behind the toilet, the caulk line where the tub meets the wall, the seam under the vanity cabinet, holes in tile grout, the baseboard along the back wall, and the window frame or exhaust vent if it opens to the outside. Feel under the sink for damp carpet or a swollen cabinet base, and look for a dripping faucet or a slow drain.
Capture one ant in a sealed container so you can compare it later. Small dark ants under about 1/8 inch are usually little black or odorous house ants, which nest in wall voids and under baseboards. Pale, translucent yellow ants of similar size are pharaoh ants, the hardest type to clear because colonies run multiple queens and split into satellite nests. Larger dark ants, roughly 1/4 to 1/2 inch, especially with wings in a damp area, point toward carpenter ants, which nest in wet wood and need professional attention.
If your ants are concentrated in standing water, in mold, or in rotting wood rather than on a dry trail, treat that as the primary problem. Ants following a plumbing trap or a wet sill are using water as much as food, and no amount of bait changes that until the moisture is fixed.
Step 2: Remove Food, Moisture, and Scent Trails
Clean first, because ants follow a chemical scent trail laid down by their own foragers. Wipe it away and they lose the route back to the colony, which is why wiping sometimes seems to solve the problem for a few days.
Start at the sink. Scrub toothpaste residue, soap scum and toothpaste caps out of the basin, around the drain and off the faucet handles, then wipe the counter and backsplash with soapy water and a paper towel. Hair and skin cells in the tub and on the floor carry the same signal, so give both a wash. Move damp towels off the floor and out of the room rather than folding them onto a shelf in the next room.
Next, attack water. Repair a dripping faucet or a loose pipe fitting under the vanity, wipe out the sink drain stopper and clean the overflow hole on the tub, and run the shower until the drain runs clear. If you have a squeegee, use it on the shower walls after every shower; if not, a dry microfiber towel on the rod works. Run the exhaust fan for fifteen to twenty minutes after a hot shower, or leave the door open so humidity has somewhere to go.
Never mix cleaning products. Bleach plus vinegar or bleach plus ammonia makes toxic gas, and in a small bathroom that is a real exposure risk. Use one cleaner at a time, and rinse with clean water when you move from the sink to the tub.
Step 3: Seal Cracks and Repair Damaged Areas
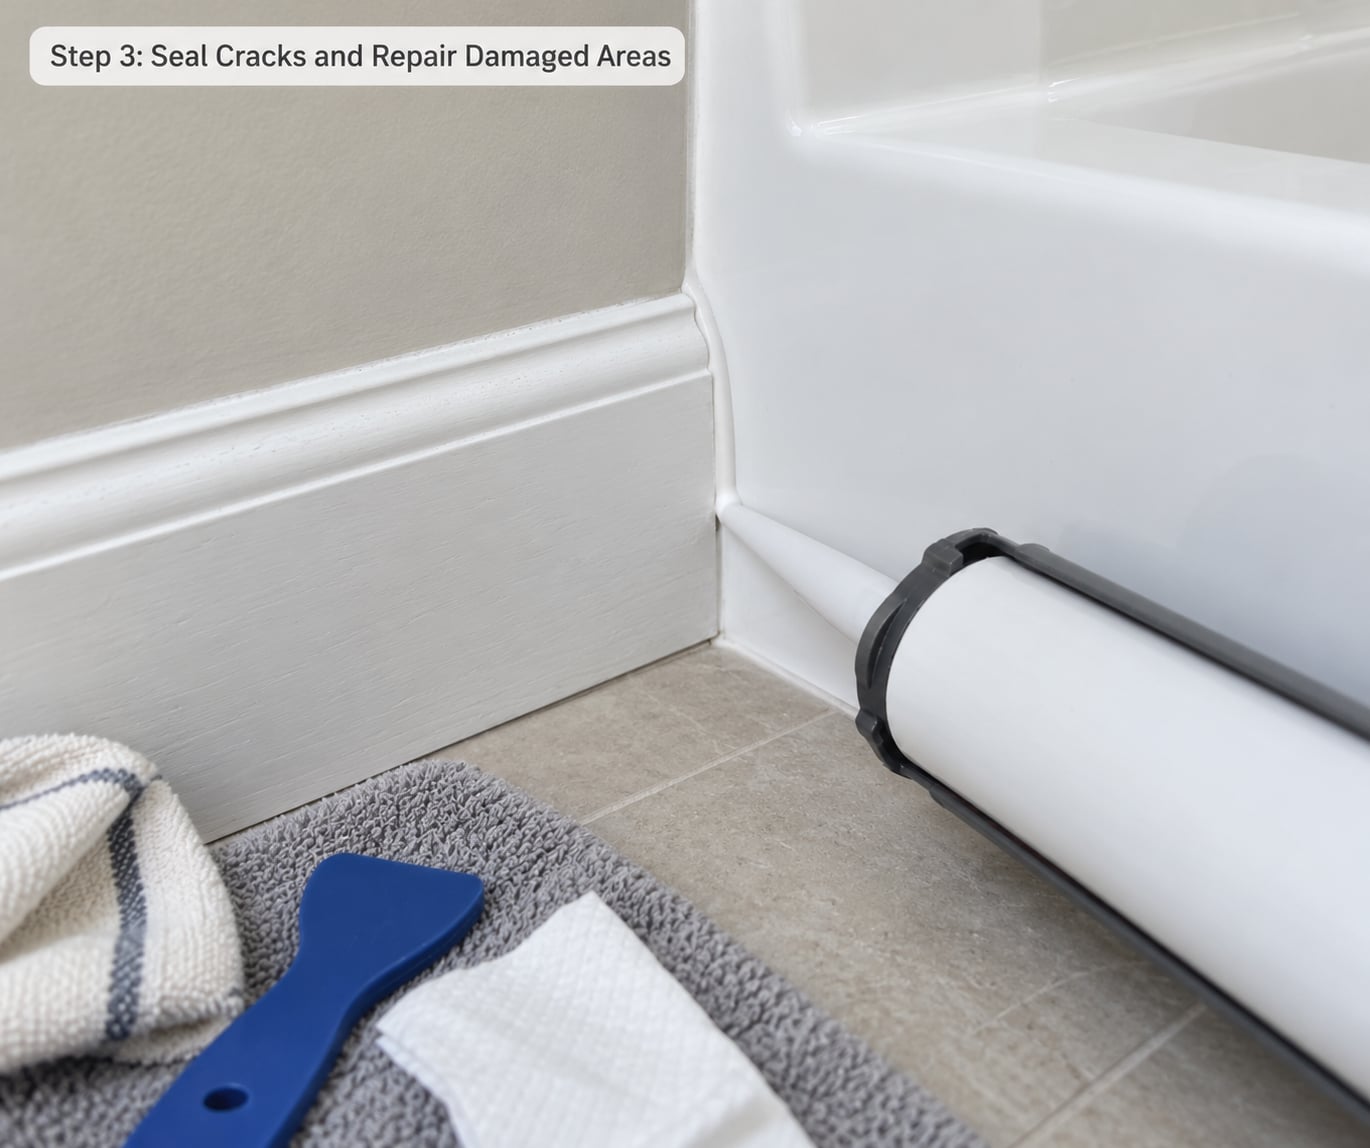
An ant needs a gap the width of a pencil, so look for openings in that range rather than obvious holes. Run a finger along the baseboard seam, where the wall meets the tub surround, and around every pipe and drain penetration. Fill those gaps with paintable interior caulk, or push plumber’s putty into wider spaces where plumbing enters a wall. Copper mesh packed into a gap before caulking blocks openings that are too wide for sealant alone.
Keep the distinction straight between a cosmetic repair and a real seal. A bead of paintable caulk over a hairline gap in the caulk line is a genuine fix. A thick smear of caulk over an active route into a wall void hides the problem for a season and then the ants are back, because you sealed the visible trail and not the entry.
Some jobs are not yours. If a pipe passes through a fire-rated wall, if you would need to cut into drywall, if the damage involves a joist or subfloor, or if you are in a rental, stop and contact the building manager or a licensed contractor. Filling a structural gap is not a weekend project, and in a shared building the entry point may be in a neighbouring unit or a common utility run.
Step 4: Place Ant Bait Near the Active Trail
Put bait where the ants are already feeding, not right beside the hole they enter through. A gel bait placed along a live trail gets picked up by foragers within hours, carried back to the colony and shared, including to the queen. That slow transfer is the entire point, and it is why bait is the only method that reaches the source.
Follow the label exactly. It will tell you how much to apply, where it is safe to place it and how often to check it. Do not spray any product near bait. Aerosol and cleaner fumes create a chemical barrier that repels ants from the bait instead, which is the single most common reason bait appears to fail after a day or two.
Spray, in turn, can do real damage beyond the visible ants. Killing foragers outright can push a pharaoh ant colony into budding, where a new queen and a handful of workers break off and start a satellite nest somewhere else in the wall. You end up trading one colony for two and lose the trail you were using to find the entry point.
Keep bait out of reach of children and pets, out of the tub or basin where it can wash down the drain, and off surfaces near a toilet. A taped bait station tucked behind the toilet or at the back of the vanity edge is usually a better spot than the middle of the counter.
Step 5: Monitor Activity and Repeat Cleaning
Give the treatment a realistic window. Foragers pick up bait within a day or two, and the colony takes one to two weeks to collapse after that. Set a two-week check-in, with a first look at 48 hours, and hold off on any other method during that time unless the label allows it.
Visible activity often rises in the first few days, and that is not a failure. Foragers that have not yet carried bait home are still running the same route, and more of them gather around a fresh bait station because it is now the strongest food source on the trail. One r/pestcontrol user put gel bait near the entrance and found a pile of dead ants in the tub the next day, and the read on that thread was that the bait was working, not failing.
Use a simple progress test: after a few days, wipe the trail with soapy water and leave it alone. If ants do not rebuild the line within 24 hours, the route has broken and you are close. Vacuum or wipe up dead ants as they appear so you can also see fresh activity rather than a pile of old bodies.
Refresh or reposition bait as the label directs, and keep cleaning without touching the bait itself. If activity is still climbing after two weeks of correct placement, or you never found the entry point, reassess the species. That is the signal to move to Step 6 rather than add more chemicals.
Step 6: Prevent a Return and Know When to Call a Pro
Prevention is a small weekly routine, and it is what keeps a bathroom ant-free after the treatment ends. Wipe the sink and counter with soapy water once a week, take the damp towels out to dry elsewhere, run the exhaust fan after every shower, and take the trash out before it has anything in it to ferment.
Store toothpaste, toothpaste tubes, mouthwash, hair products and pet food in sealed containers rather than open on the counter or the top of the toilet tank. Vacuum the baseboards and under the vanity while you are there, and check the pipe penetrations behind the toilet each month, since that is the gap homeowners most often miss. Outside, remove leaf litter, bark mulch and wood scraps from the foundation and keep soil against the wall a few inches below the siding, because ants travel from the soil into the structure.
Call a pest control professional when you see one of four things. First, carpenter ant damage: galleries or smoothed, bleached wood in a damp area, sawdust-like debris, or large dark ants with wings near the tub or roof framing. Second, repeated entry points you cannot seal yourself, especially in a rental or condo. Third, heavy hidden activity, meaning many ants appearing from a wall void or from around a plumbing pipe with no trail you can reach. Fourth, persistence beyond the label timeline with no visible improvement after two weeks of correct bait placement.
Time of year matters too. Indoor ant activity usually jumps after heavy rain and through the warm months, because foragers expand and new reproductive flights happen, so a bathroom that was quiet in January can be busy in May without anything changing indoors.
Common Mistakes
Nearly every failed bathroom ant treatment comes down to one of these. Each has a simple fix, and all of them are free.
- Spraying over bait. Aerosol repels foragers from the poison and stalls the only method that reaches the colony. Move any spray away from the bait station until treatment is finished.
- Killing visible ants and calling it done. You removed workers, not the nest. The trail rebuilds within days because the colony is still producing foragers.
- Using outdoor pesticides indoors. Products labeled for lawns, gardens and exteriors can be far more toxic and are not registered for bathroom surfaces near water. Use a product labeled for indoor use and follow its label.
- Mixing cleaners. Bleach with vinegar or bleach with ammonia produces toxic gas in a small, poorly ventilated room. Use one product at a time.
- Ignoring moisture. A dripping faucet, a damp towel or a dry trap that does not seal gives ants a reason to keep coming back no matter what you bait.
- Sealing only the visible trail. A heavy bead of caulk over a trail hides the route but leaves the entry point open in the wall or baseboard. Follow the trail to its actual source.
- Cleaning bait away too soon. Wiping a counter where bait is working destroys the workers’ path to it. Leave bait alone for the full period on the label.
Two habits cover most of it. Clean and dry on a weekly schedule, and check entry points monthly. Do those and you will not be doing the six-step plan twice in one season.
Frequently Asked Questions
How long does it take to get rid of ants in a bathroom?
Expect a visible drop in activity within 48 hours of placing bait, then allow one to two weeks for the colony to collapse, and two to four weeks for full clearance. Nothing works overnight, because workers have to carry bait back to the nest first. If the trail rebuilds within 24 hours of being wiped, you still have active foragers and should keep the bait in place.
Will one ant in the bathroom mean I have an infestation?
Not necessarily. A single scout often means the colony is already in your wall or under the vanity, since a forager will not find and evaluate a new bathroom unless it is close to a nest. Watch for a line that persists for days, ants carrying eggs, or activity that spreads to the kitchen. A recurring single ant is still worth sealing the gap it came through.
Should I use ant bait or spray in my bathroom?
Use bait. Workers pick it up and carry it back to the colony, where it is shared with other workers and the queen, so the source is reached rather than the symptoms. Spray kills only the ants it touches and its chemical odor repels ants away from bait placed nearby. Never use a spray near an active bait station.
Does vinegar or bleach get rid of bathroom ants permanently?
Neither does. Vinegar in water removes the pheromone trail and kills an ant on contact, and soapy water works the same way, but both need reapplication and neither reaches the colony. Bleach kills ants on contact only and is strong enough to damage grout and finishes when mixed with other cleaners. Use them to clean, then use bait to treat.
Why are more ants appearing after I put down ant bait?
Foragers that have not carried bait home are still following the old route, and many gather around a bait station because it is now the richest food source on the trail. More ants briefly means the bait is being eaten. Leave it in place for the full period on the label and judge results over one to two weeks, not two days.
Conclusion
If you do five things in this order, most bathroom ant problems end that season. Identify the ant so you know what you are dealing with, remove moisture and food residue, wipe out the scent trail, place labeled bait on the live trail and leave it untouched, then seal the entry gap with interior caulk. Monitor for two weeks and keep the weekly clean-and-dry routine going, and call a professional if you see carpenter ant damage or nothing changes after a fair trial.